Thursday 9 December 2010
Cities of Death campaign map!
Battle for Tcharkov is gonna finish soon so we are planning a new campaign with the Cities of Death expansion, just to make a little change! this is gonna be the new map, from Googlemaps... most of you will not understand why it is so funny, but hey, what a gag!
Labels:
campaign,
Cities of Death,
concept,
Warhammer 40000
Friday 3 December 2010
Gothic DIY scenery WIP part II
do you remember this?
well, i made some changes like removing almost all that ugly ball-textured polystyrene and replacing it with more compact stuff. the parts that still show the old styrene are gonna be treated with some filler in order to make them look like masonry work.
i really like the theme of the stairs because they make me remember the scene of the 1925 movie "The Battleship Potemkin" where the cossacks shoot the sailors, even if these stairs are much shorter. also, i really like how the space marine statue looks in the gable. i'm planning to add some texture, like a wire mesh or something, to the circular window that should be a rose window.
thoughts?
Labels:
Cities of Death,
modelling,
scenery,
Warhammer 40000,
WIP
Wednesday 1 December 2010
Ruined temple part II, still WIP but with some detail
back to work!
i've added some detail to the temple as you can see. nothing special i know, but i think this extra stuff really contribute to give some personality to this piece of terrain. the space marines statues are 2nd edition miniature that came with the old boxed set 1994, i guess. the skulls on the bases are from skeletons sprues. on the top of the facade there's a simple decoration made with one round base, a winged skull from imperial guard vehicle sprue and some rivets.
any suggestion?
Labels:
Cities of Death,
modelling,
scenery,
Warhammer 40000,
WIP
Monday 29 November 2010
headbutt on the bus windscreen!
hey!
today i broke the windscreen of a bus with my head so no miniatures painting for a while! i can't believe how much hard my head is!
by the way, i'm ok, so don't even worry!
today i broke the windscreen of a bus with my head so no miniatures painting for a while! i can't believe how much hard my head is!
by the way, i'm ok, so don't even worry!
Saturday 27 November 2010
Ruined Temple WIP
i've officially started to model my Cities of Death scenery in order to start playing as soon as possible at Killteam.
this first piece is nothing special: just styrofoam front with gothic windows and some lancet arches.
i added on the back the big aquila sculpture that i found in the Honoured Imperium box, just to give the place a "holy" feel.
hand made crater. tutorial on the way. soon, i swear!
i feel there are lots of things missing, especially on the frontage so i'm gonna add lots of details. any suggestion?
Labels:
Cities of Death,
modelling,
scenery,
Warhammer 40000,
WIP
Thursday 25 November 2010
Kill Team camo scheme part II
more Killteam camo scheme! i chose to paint the flak armour grey in combination to the camo scheme of the fatigues just to give this soldier a ww2 feel... just think to Wehrmacht/SS soldiers on the western front in 1944, you couldn't find two men dressed in the same way, so this is what i'm trying to achieve.
the camouflage is done this way:
the camouflage is done this way:
- black primer
- catachan green basecoat
- bestial brown spots
- bubonic brown spots
- black wash
- 50/50 camo green + catachan green highlight
- snakebite leather highlight
Labels:
Classic Cadians,
Imperial Guard,
Kill Team,
painting,
Rare,
Warhammer 40000,
WIP
Wednesday 24 November 2010
Kill Team camo scheme
have you ever played the Killteam mission from Battle Missions expansion?
i never did but as soon as i read the rules i totally got into that so i'm planning a new camo scheme for my imperial guard. this time i want something for a temperate enviroment, just for difference sake, it's boring to paint all the time the same camo scheme.
the idea was to recreate something with a Wehrmacht flavour so i chose these colours. i'm not sure about this scheme so i'm making a lot of sketches. let me know what do you think about guys!
Labels:
Imperial Guard,
Kill Team,
painting,
Valhallans,
Warhammer 40000,
WIP
Tuesday 23 November 2010
Imperial guard progress
we are slowly progressing... eheh. what do you think i should do next? i'm planning to remove rough riders because on the latest faq it came out that furious charge doesn't stack with hunting lance bonus so...
Monday 22 November 2010
Chimera 4A1
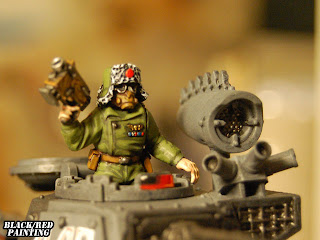
 so, the famous stretched Chimera is finally done!
it took me a lot of time to model ad decide how it should look (also because of my laziness) but now it's over.
 the camo scheme is the usual one: classic stripes with urban colours. the checker pattern is the designation of command tank (sometimes the company command squad rides this tank, depending on the mission), painted just to make it easier to distinguish (for the opponent) where the squad with different equipment is. the red dragon badge, on the left, indicates the squadron (platoon A). the roman numeral VI indicates the company.
 the same on this side. check out the wooden boxes! il like them a lot! on the top i modeled a camo net with some bandage kept hard with PVA glue.
 artistic shot I: tank commander
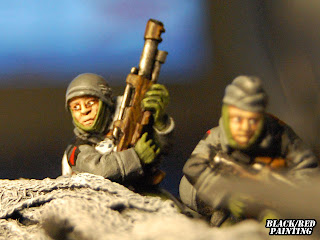 artistic shot II: 1st passenger
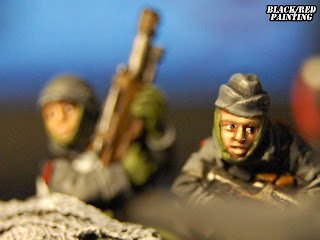 artistic shot III: 2nd passenger
which chimera do you like more?
Labels:
Imperial Guard,
painting,
Valhallans,
Warhammer 40000
Sunday 21 November 2010
Catachan tank commander

 more catachans!
this is the Leman Russ Exterminator tank commander that came with the old kit (1999). it belongs to Teo and his name his J.A. Tiger (ahah, very A-Team)! obviously counts as knight commander Pask!
personally i'm pretty proud of the aquila sign on the helmet and the specs. do you like it, guys?
Labels:
Catachans,
Imperial Guard,
painting,
Warhammer 40000
Saturday 20 November 2010
Catachan testpaint over!
 this is the final result, i'm pretty satisfied with it. quite similar with GW's Catachan scheme but with more personality in my opinion.
if you are wondering from where this miniature is coming from, well, it came together with a tank commander in the old Leman Russ Exterminator kit (1999). yes, with the 3rd edition codex you could deploy that tank but it was far less powerful than now. it is a leman russ passenger, and should look like this:
 how nice! the tank commander is the next!
Labels:
Catachans,
Imperial Guard,
painting,
Warhammer 40000
Friday 19 November 2010
Catachan testpaint part II
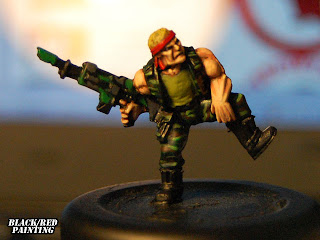 so this time we've got to think about the lasgun's camo scheme. which is better? black + snot green (above) or black + camo green (below)?
 please, let us know!
Labels:
Catachans,
Imperial Guard,
painting,
Warhammer 40000,
WIP
Wednesday 17 November 2010
Limited edition Valhallan tank riders
 do you remember these guys? they came for free with che old Chimera kit (1996 circa) with another tank commander (that i don't own)... below, the one on the right. it is still available from GW mailorder while the passengers are gone but i think you can find them on Ebay.
 so, i added those guys on my streched chimera and painted it as my command tank
 i'll post the whole model as soon as i finish it!
Labels:
Imperial Guard,
painting,
Valhallans,
Warhammer 40000
Friday 12 November 2010
Chimera 4A2
 another tank is done! i'm getting ready for a tournament on sunday.
this is a pretty plain chimera without much conversions. i've armed this apc with a hull mounted heavy flamer and added an old fuel cylinder under that. i've also painted some scorches on the flamer barrel.
 i added to the turret a targeting box taken from the old leman russ kit, which fits perfectly the new chimera turret. the roman numeral "IV" represents the company icon (4th company, infantry, 34th valhallan regiment).
 as usual the camo scheme has been painted with vallejo german grey and codex grey for the light tone and black and german grey for the dark tone. on the turret the number "4A2" indicates that this tank belongs to the 4th company, infantry platoon A, 2nd squad. the red dragon icon on white background is the squadron (platoon) designation, in the same way of leman russ squadrons. on the rear you can see the army badge.
 rear ramp, with tank number and regimental designation.
 plastic tank commander from the chimera kit with a Pig Iron head. please notice the wooden casing of the bolt pistol and the extra armour on the turret.
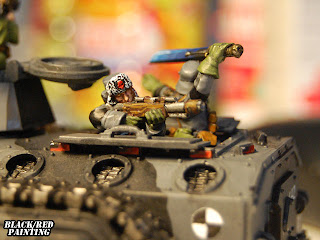 valhallan passenger: that's just a classic metal trooper painted and glued on a support inside the tank.
 steel legion passenger: i think it fits well in a valhallan army... and i really like the way i painted the power sword. looks like he is barking some orders :-)
do you like it? more chimeras to come!
Labels:
Imperial Guard,
painting,
Steel Legion,
Valhallans,
Warhammer 40000
Thursday 11 November 2010
Monday 8 November 2010
Tuesday 2 November 2010
Guess what? Vendetta complete!
 finally, another mission is complete! what a satisfaction!
as i already said this model has been a pain to paint but in the end the result is wonderful, at least in my opinion. let me tell you something about this model. first of all there are no conversions except the weapons (check them out here and here).
second: i've also painted the machinegunners but the hatches got somehow glued by the paint while it was drying so i couldn't put them in place but i will for sure, even if i don't pay them.
 the colour scheme and the labels layout is clearly borrowed from ww2 aircrafts.
 i thought that a white underbelly scheme could be a good idea to disguise the aircraft, preventing enemy AA batteries to hit it.
 also, a low visibility identification number on the rear ramp should be useful. on this model there is no standard lettering like on my Leman Russ, because of concealment needs.
 Aquila signs on both wings to identify the aircraft as a loyalist vehicle.
 scorches and wear on engines and fuselage... and another low visibility identification number.
 from left to right: company designation (8th company, recon), killcount, squadron designation (5th squadron).
 cockpit.
do you like it?
Sunday 31 October 2010
Vendetta engine scorch
 more suggestions on how to paint scorches. when a Valkyrie/Vendetta uses the engine's afterburners (provided it has some, and it should), there will be a scorch effect on the inner part of both tails due to the flame that comes out of the nozzle.
i think it has been a good idea to paint that in a proper way, which is very very simple: just drybrush a sort of wake with some Scorched brown and the add a smaller layer of drybrushed black above. then give the area a rich black wash and you're done.
Saturday 30 October 2010
How to paint a burned barrel
 really easy but effective tip: painting a gun barrel (or an exhaust tube) in a proper way to represent a burned part is much cooler to see than a gun with a plain metal finish so i'm gonna tell you how to achieve that without much effort. we're gonna pass through 4 steps:
1) wash the gun with a really watered down Snakebite leather

2) wash a smaller area with Bestial brown
 3) now do the same with Scorched brown
 4) last: give the barrel a Black wash to make everything homogenous
 and there you go!
Subscribe to:
Posts (Atom)


